Using Stone Oil and X-Tra Seal for a Silky Shine on Quarry Tiles in Stourbridge
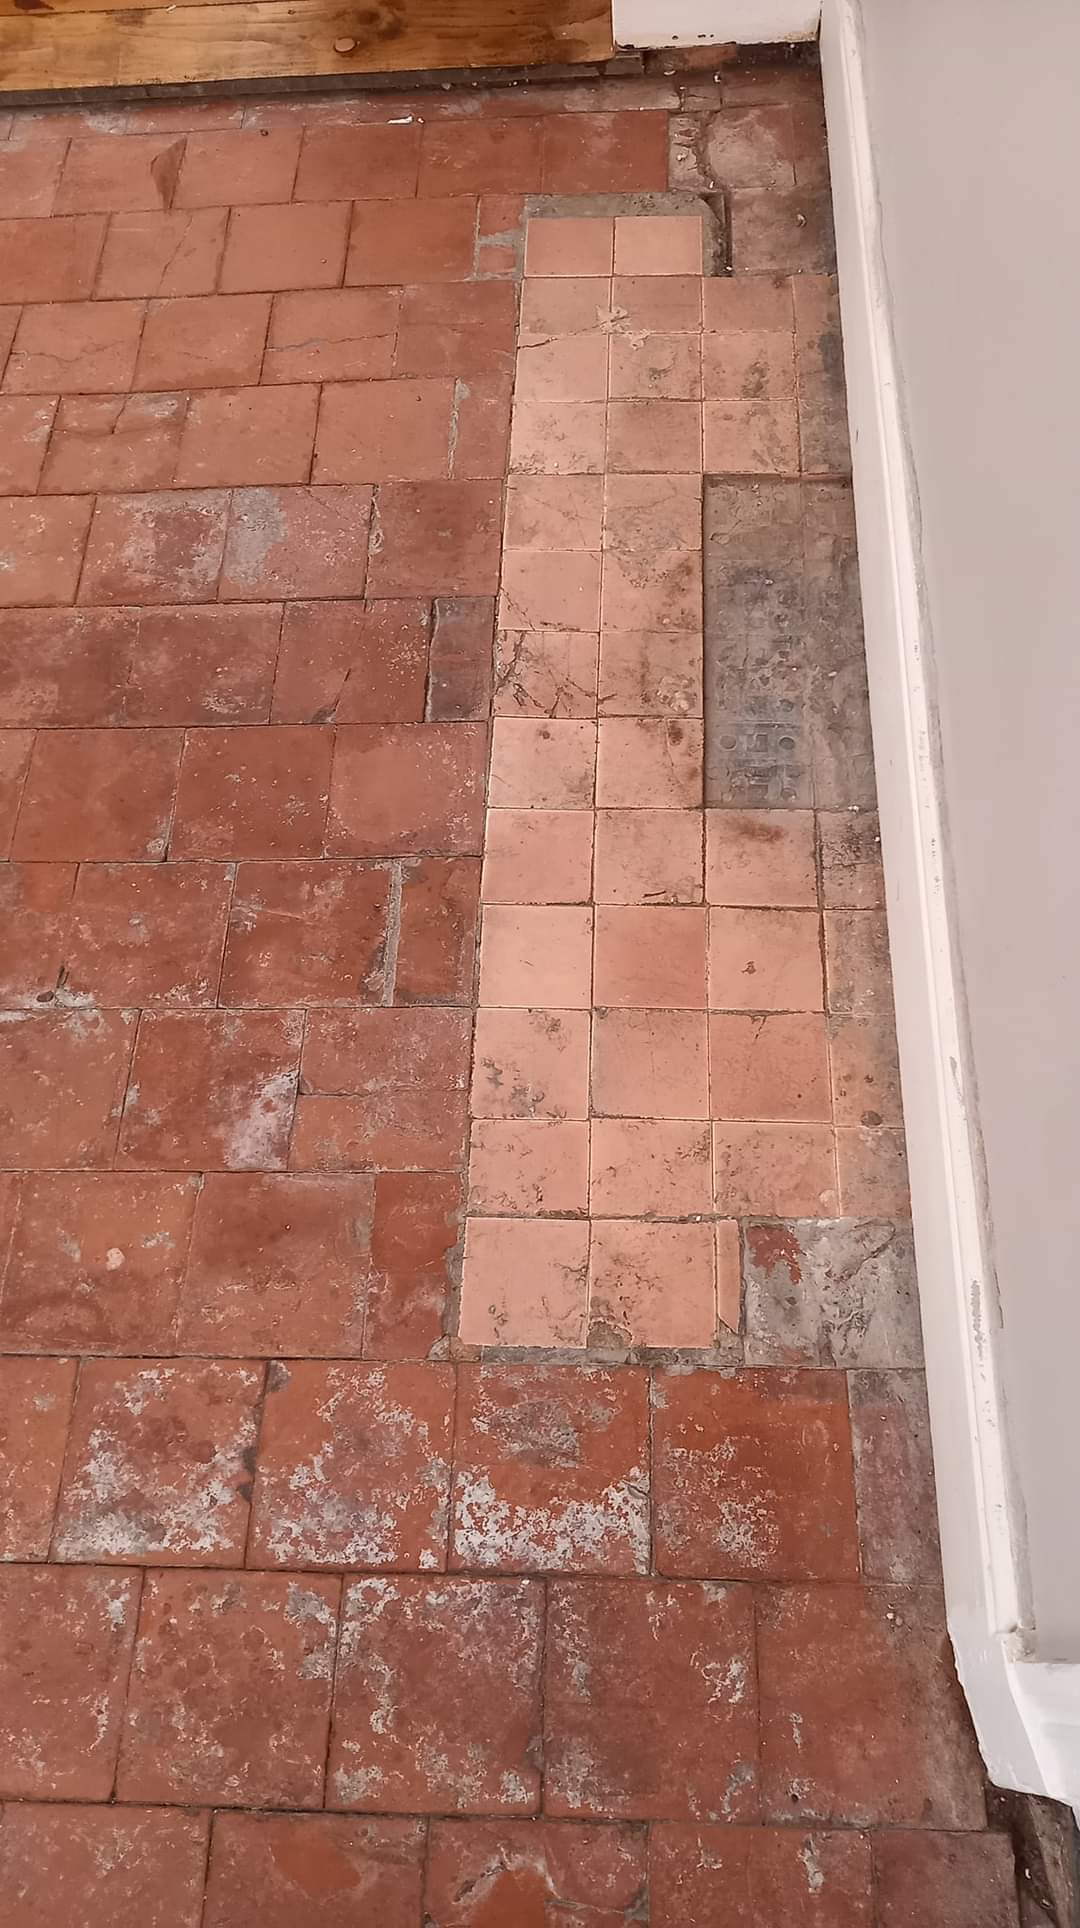
This customer from the historic West Midland’s town of Stourbridge contacted me about their living room floor which was laid with Quarry tiles; however, one area which I suspect may have originally been a fireplace had been tiled with pale ceramic Pink tiles. These would need to be removed and replaced with matching quarry tiles if the floor was to have a consistent appearance.

Whilst surveying the floor I conducted a test clean on a section of Quarry tiles which came up well and I discussed sourcing matching replacements with the owner. I knew of a reclamation yard local close to the customer that I’ve previously used, he suggested getting his own replacements from there which I was happy with and the work was booked in.
Repairing and Cleaning a Quarry Tiled Floor
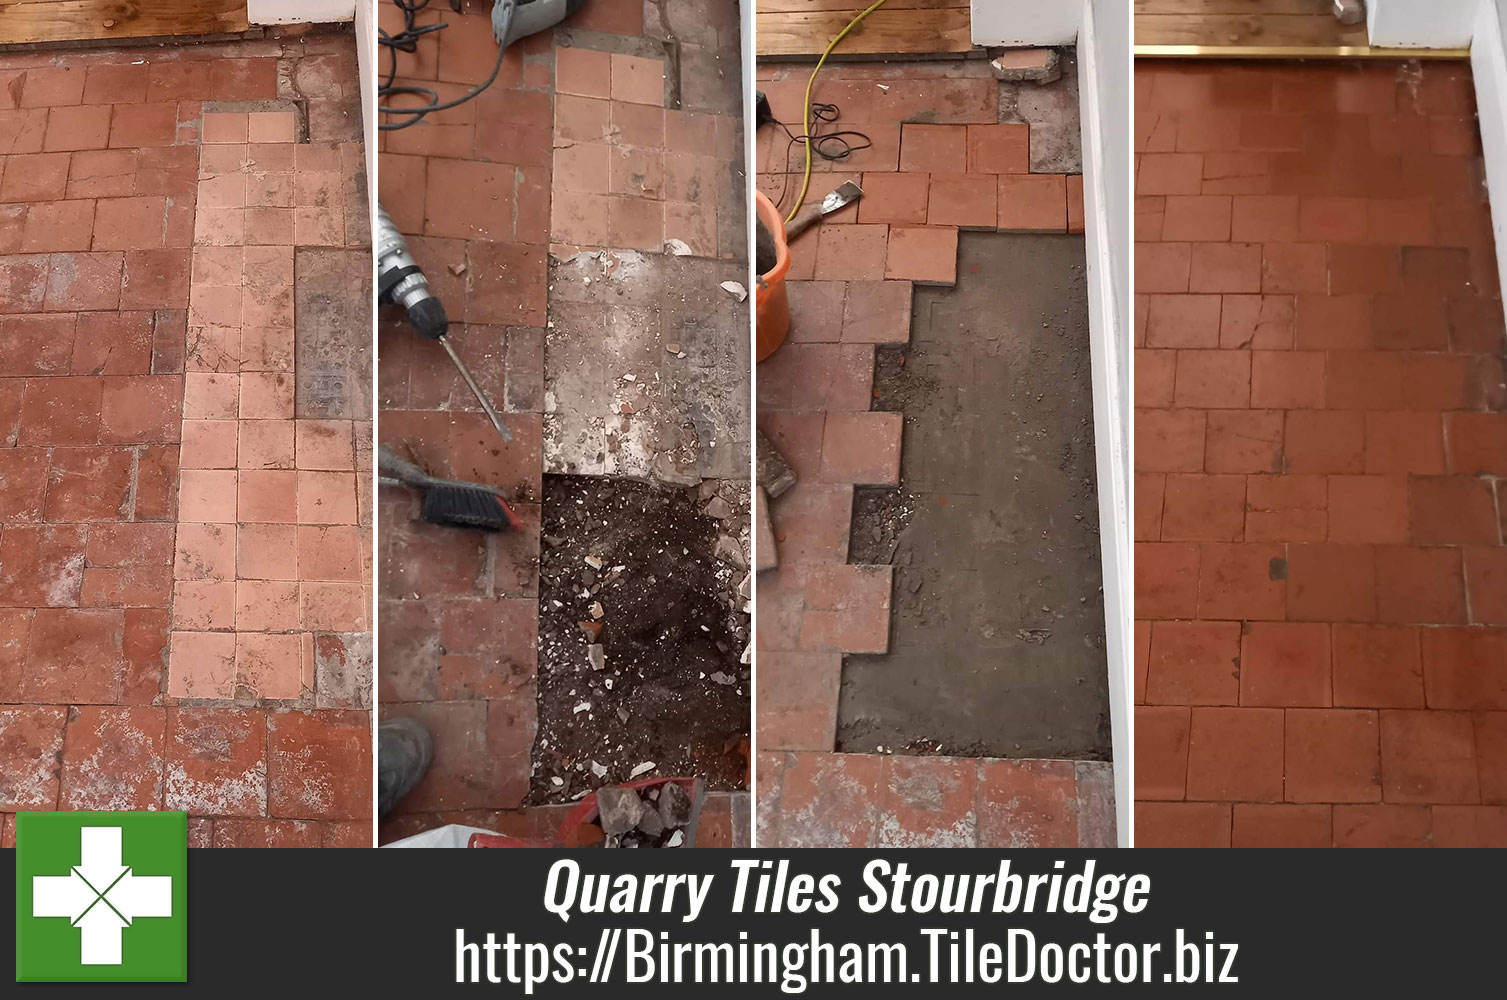
On arrival I looked at the reclaimed tiles the owner had sourced and noticed they were all approx. 5mm larger than the original tiles. So, before doing anything else I had to cut them all to size with my wet tile cutter. This is messy work with quarry tiles as they create an orange slurry when cut, if you’re not careful you’ll end up looking like an Oompa Loompa after cutting them!
 |  |
Next I had to remove the Pink Ceramic tiles and dig into the area underneath to ensure the thicker Quarry tiles would be level with the surface of the existing floor. Once the debris had been cleared, I was then able to apply a self-levelling compound to bring the sub-floor up to the required level. The levelling compound was left to dry off overnight and I returned the next day to fit the cut tiles and grout them in after the adhesive had dried.
 |  |
The next day with the replacement tiles set I was able to clean the whole floor with Tile Doctor Remove & Go which was allowed to soak in for a while and then topped up so not to dry out. I then used a silicon carbide brush fitted to a weighted rotary machine to scrub the floor and loosen all the dirt. Next job was to run a stiff brush along the grout lines to get them clean as well, before rinsing and extracting the dirt with a portable Airflex Pro wet vacuum. I use a low psi so as not to apply too much water.
The floor was then towelled off before starting the last part of the cleaning process which involves treating the tiles with an acid-rinse using a dilution of Tile Doctor Grout Clean-Up. This is an acidic product that can remove mineral staining and will also counter any alkaline salt deposits in the pores of the tile that could surface as the floor dries.
The floor was then rinsed and towel dried as before but this time I left a couple of floor fans in place to assist with the drying whilst I packed away the machinery.
Sealing a Quarry Tiled Floor
After an hour I applied a single coat of Tile Doctor Stone Oil, I find that this helps bring the colour of the Quary tile, aids drying and minimises any efflorescence salts coming through overnight.

I returned next day to fully seal the floor. The floor was old with no damp proof membrane installed and had shown signs of dampness In the past. Because of this I recommended using Tile Doctor X-Tra seal to seal the floor which is fully breathable sealer and will cope well with any damp issues. Additionally, this applied with the stone oil adds a nice slight sheen to the floor which really lifts its appearance.

The deep clean and new sealer really helped blend in the replacement tiles with the original and once complete my customer was very happy with the transformation. Before leaving we discussed aftercare and I left them a complimentary bottle of Neutral Tile Cleaner to maintain the tiles going forward. This is a pH neutral product that is safe to use on sealed surfaces and won’t prematurely erode the sealer like many stronger tile cleaners you will find in supermarkets.
Source: Quarry Tile Cleaning and Sealing Products and Services in Stourbridge West Midlands
