Using Multiple Tile Doctor Products to Remove Varnish from Victorian Floor Tiles in Horncastle
The owner of a large Manor house near Horncastle invited us round to survey their large Victorian tiled hall. The tiles were thought to be around 150 years old and in good condition considering their age. Unfortunately, they were last sealed with Varnish which is the last thing you should seal a floor with, not only is it easily scratched but it can become a skating rink when wet.
My client requested a deep clean to remove the varnish and then sealing with a more appropriate product that would bring out the best in the tile. Being the entrance and main hall, it was important to renovate the floor so it looked its best and give the best impression to visitors.

On inspection I could see the floor would need some repairs and a deep clean with diamond pads to remove the old sealers/varnish and deep clean the tiles. It was also important to use a breathable sealer on an older property where no damp proof membrane is present. Our quote was accepted and time arranged to complete the work.

Deep Cleaning a Large Victorian Hallway
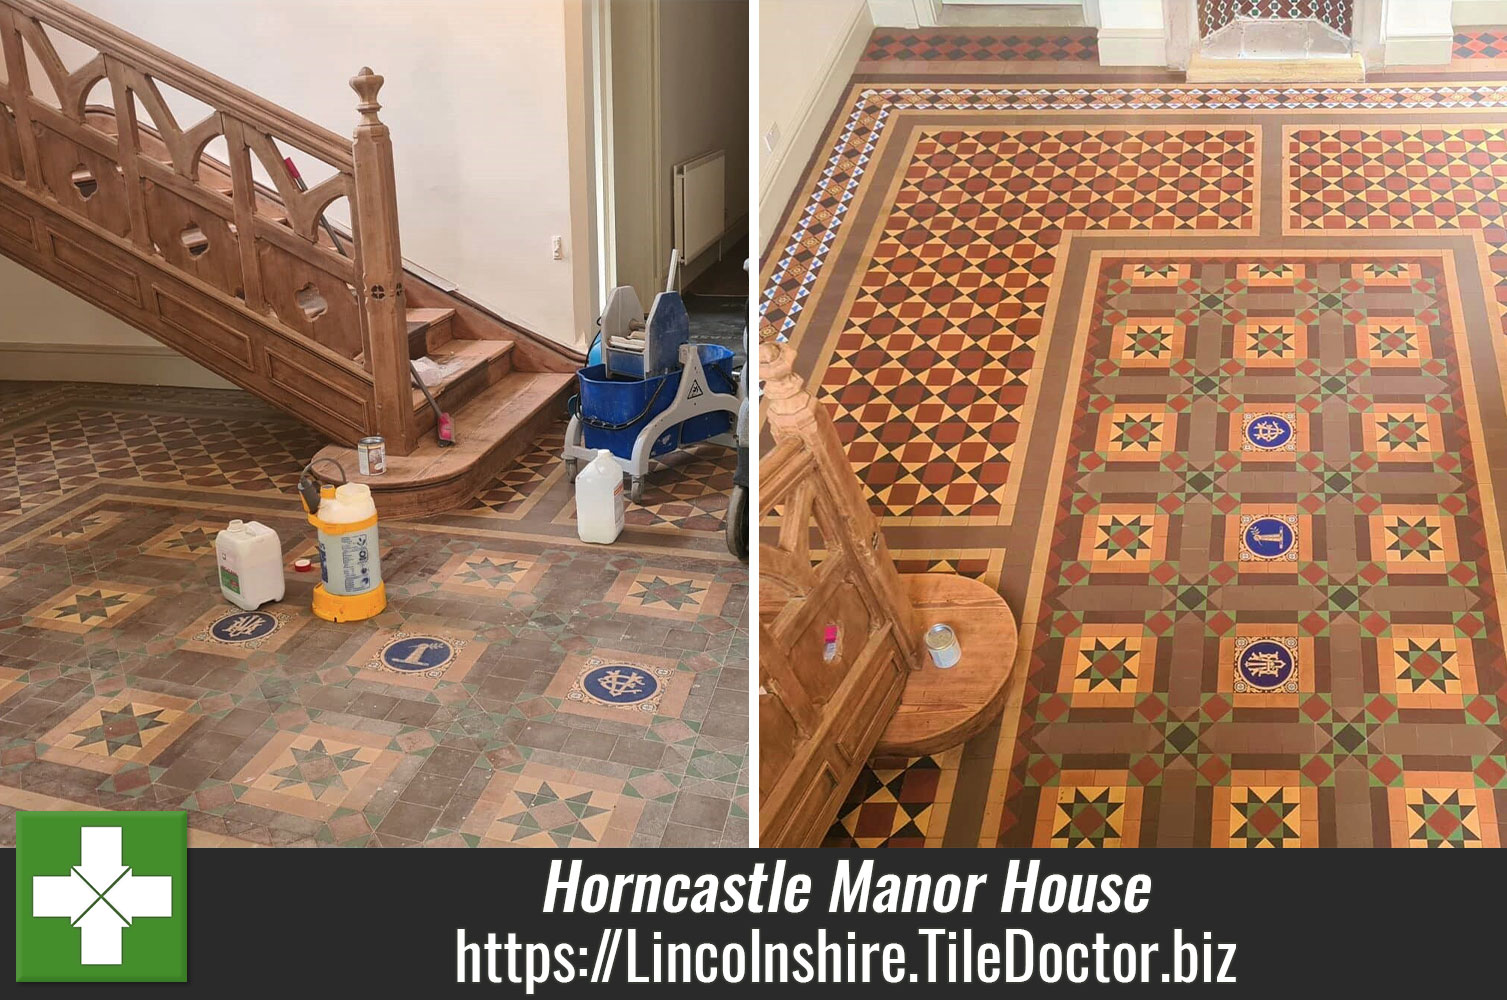
On the first two days I set about deep cleaning the tiles using Tile Doctor Pro-Clean Tile and Grout Cleaner and Tile Doctor Remove and Go which is a stripper/coatings remover. These products were applied to the floor, left to soak in for ten minutes and then worked in with a 200-grit and then 400-grit diamond pads fitted to a weighted buffer machine.
The pads are run over each part of the floor which generates a lot of soiling and then the soiling is removed using a wet vacuum. This process was completed three times to make sure the tiles were clean; the old sealer and varnish was gone and the vibrant colours had come back to life. After a final rinse and extraction, the floor was reviewed and any stubborn areas and edges were spot cleaned by hand as needed.

We spent a total of 2 days cleaning the whole floor and rinse extracting after each clean. Repairs were carried out to the grout and a few tiles replaced. The last step was to give the floor an acid rinse with Tile Doctor Grout Clean-up to help counter any efflorescent salts and further clean up the tiles. After a final rinse and extraction, the cleaning process was completed and the floor was left to dry out overnight with several dryers in place to help speed up drying.
Sealing Victorian Tiles
On the third day the floor was first tested with a damp meter to ensure it had dried before starting to apply the sealer. Fortunately, being August, the weather was excellent and as hoped the moisture readings were fine.
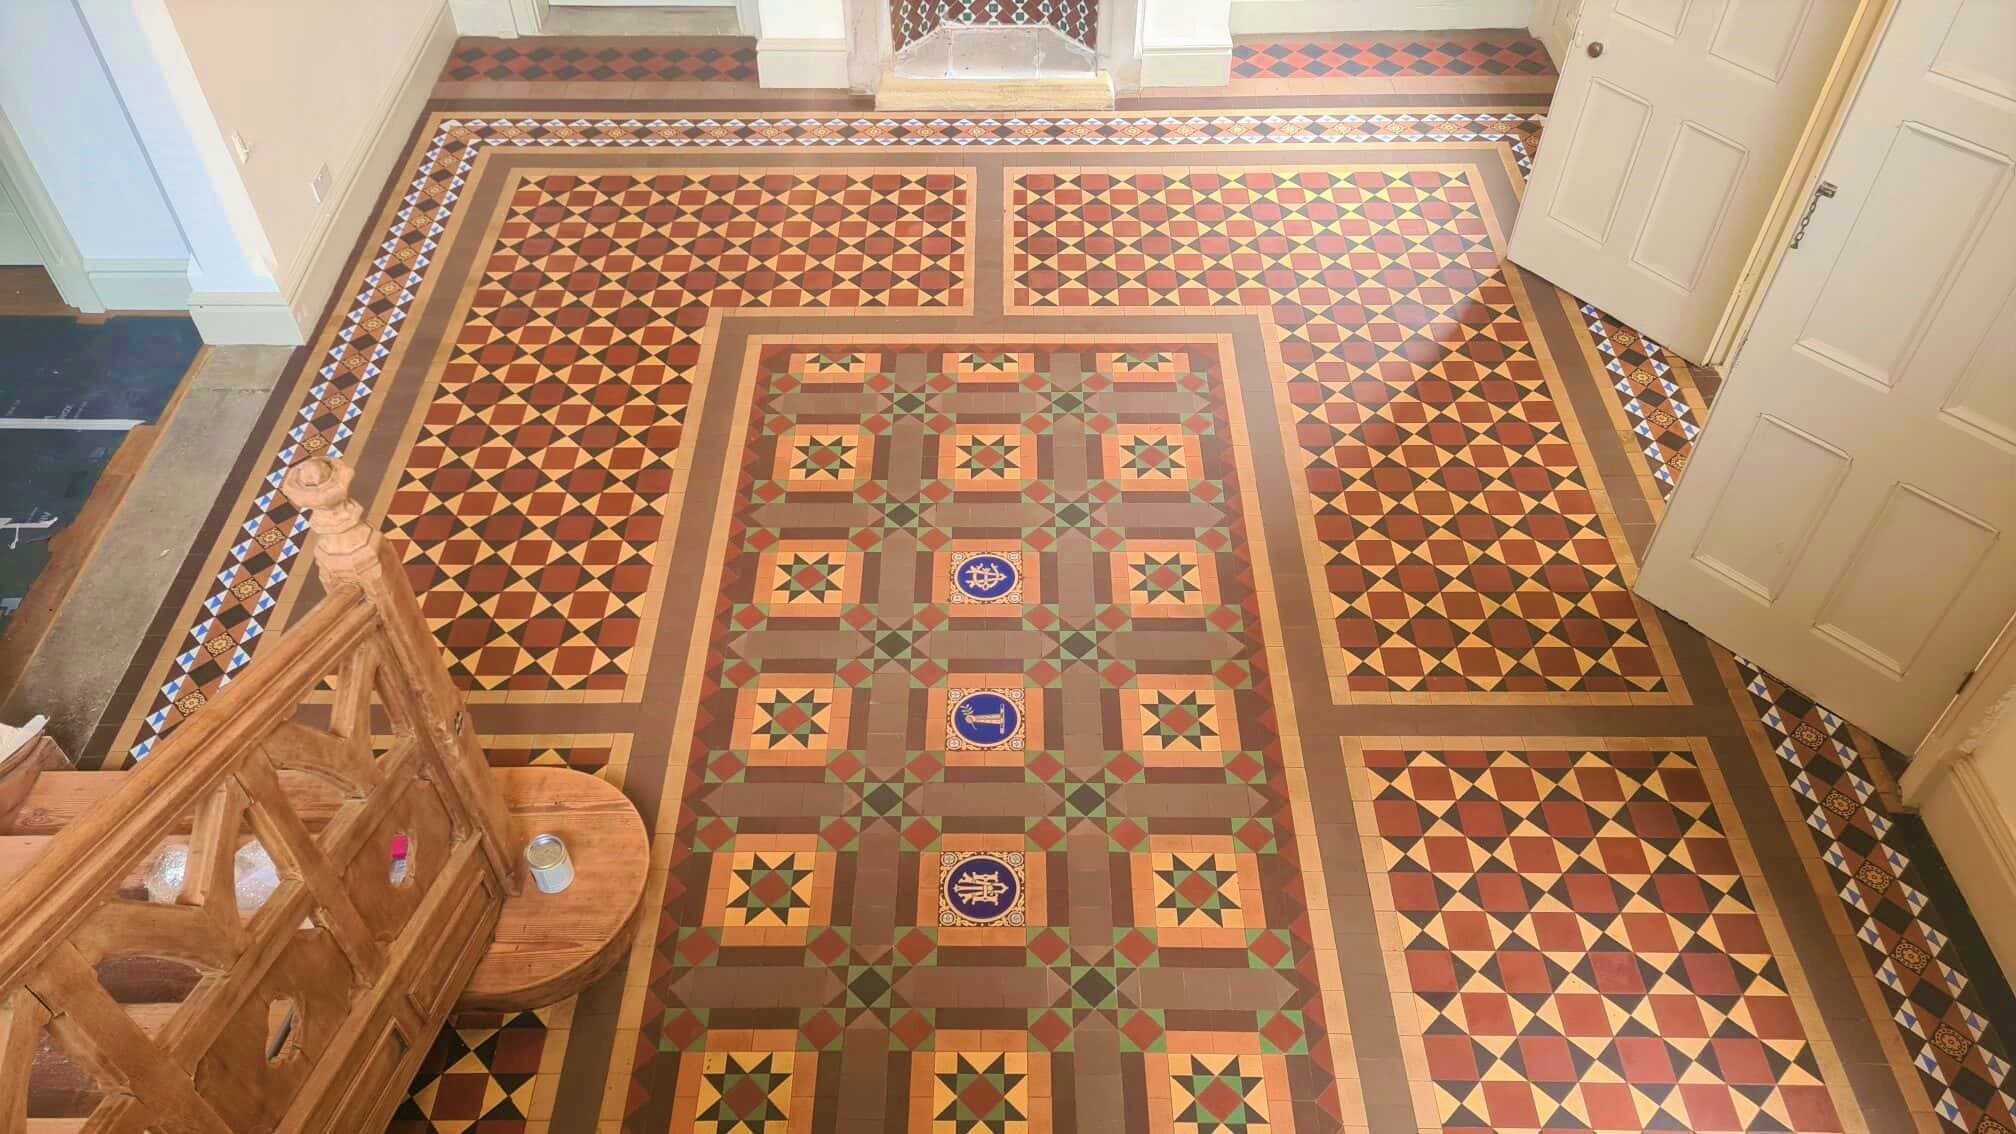
The best sealer option for is a product called Tile Doctor Colour Grow which is an impregnating colour enhance sealer that leaves a matt finish, it’s also fully breathable so will allow for moisture to rise through the tile and evaporate. Four coats of sealer were applied in all allowing time between each coat to dry. As you can see from the photographs it was a large floor so by the time I had applied a coat I was able to go back to the beginning and start the next.

The results were worth all the hard work and the customer had a stunning feature floor with a lost lasting impregnating sealer. Its worth mentioning that to help a sealer last as long as possible we recommend using a pH neutral tile cleaning products such as Tile Doctor Neutral Tile Cleaner; reason being that other products can simply too strong and contain bleach which can damage the sealer.

